Home
Diwali Snack - Masala Puri
- Details
- Category: Festival Food of India
- Published: 10 November 2012
- Written by Dinesh
- Hits: 10631
 |
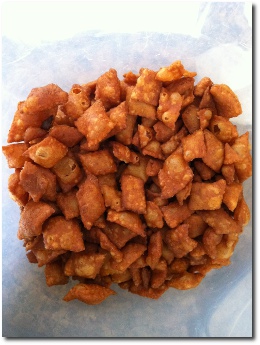
Its Diwali once again and our kitchen gets busier than usual with the preparation of snacks and sweets. We try and make at least 5 items every Diwali and it's a lot of fun. It helps bring in the energy and memories of being in India. This year, the first snack that we made was the Masala Puri. Masala Puri is a crispy and mildly spicy puri that is created by deep frying some dough. |
Diwali Snack - Shankarpali
- Details
- Category: Festival Food of India
- Published: 22 October 2011
- Written by Dinesh
- Hits: 8035
 |
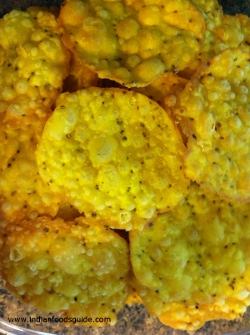
Its Diwali time, which means our house gets into the Diwali snacks preparation phase. One of the savory snacks we make every year is the Shankarpali, also called Shankarpara, Namkeen, Tukdi and many other terms across the country. Shankarpali is a deep fried snack in the shape of a diamond. Shankarpali is made from a dough of ghee, maida, semolina and salt. The mixture is made into dough and then mechanically cut into diamond shaped units which are deep fried in Ghee or Butter. |
Tips and Lessons Learnt Growing Okra in the Backyard
- Details
- Category: Gardening Articles
- Published: 02 September 2012
- Written by Dinesh
- Hits: 14431
 |
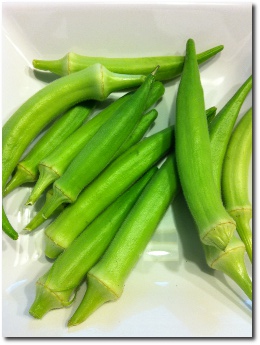
Okra (or Bhindi as its called in India) is a very popular vegetable in India. This year decided to grow Okra again because we had a good yield last year. I asked a few friends and they recommended some herbs like basil & mint and also Okra. They said Okra is easy to grow and requires little maintenance overhead. Since we love Okra I decided to give it a shot and for the most part I was successful in growing it and also cooked a couple of dishes but not before we learnt a few lessons which I thought would make for some good reading. 1. Spacing of the Okra Plants - The instructions said to plant the seeds about 12-24 inches apart (but who reads instructions) and I must have planted them 6-8 inches apart. Not a big deal, or so it looked like for the first few weeks but once they grew big, I realized my mistake. You can see from the pictures the all of plants are bunched close together and its quite messy. Plant your seeds about 18 inches apart or better yet, read the instructions. 2. Harvest / Pick Everyday - After about 7-8 weeks, you will start seeing the first signs of the Okra pods (which was super exciting) but I had no idea when to pick them and so we let them grow and grow (and grow they did). Some got to about 6-7 inches and I decided to read instructions (you are seeing a pattern here) and realized that its probably best to pick them when they are between 2-3 inches long. You will be surprised how fast they grow so you have to look at your plants everyday or 2 days at the very max. I have probably lost half my harvest because I was too late. You need to go look at your Okra plant everyday. |
3. Okra plants are very itchy - I wish this was in the instructions (which I would have read after 2 lessons learnt). Yes, Okra plants are very very itchy. Sometimes just touching one leaf can give you a pretty strong itch. Given how close our plants were, I had to move some leaves and dig in to pick the Okra and I got a strong itch which lasted a few hours (a little Cortizone cream and a wash helped). Given that its summer time, most of us would not wear long sleeves, but please wear long sleeved shirts or gloves and make sure your face does not touch it. This is probably the most important tip. Okra plants are very itchy, so make sure you are well covered.
4. Okra plants are very generous - Once the plants grow and the pods start to form, you will be amazed how much Okra you will get. With about 4 plants, we could harvest enough in a week to make something with it.
Lesser known facts about Okra :
- Gumbo is Swahili for okra.
- It also also called Lady's finger in some countries.
- Okra seeds may be roasted and ground to form a caffeinate-free substitute for coffee.
Overall, its been fun growing Okra this summer. I never had a Green thumb but I certainly do have an itchy thumb now.
Disclaimer : I am not a farmer or claim to be any expert on growing Okra or any other vegetables for that matter.
Read more: Tips and Lessons Learnt Growing Okra in the Backyard
Traditional Indian Stone Grinder - Ragado
- Details
- Category: Traditional Indian Cooking Techniques
- Published: 08 June 2011
- Written by Dinesh
- Hits: 15179
We are a fairly lucky generation as we have access to modern tools, technology and round the clock electricity (or at least most of us do). Our modern kitchens are therefore equipped with gadgets such as grinders, microwaves, ovens, griddles, toasters....you get the drift. My grandparents and the generation before them were not so fortunate and had to rely on hand operated tools and gadgets in the kitchen. One of the kitchen "appliances" my family used was the "Ragado" (that's what we call it in our native Konkani language). The Ragado or a stone grinder consisted of two heavy stones just like a mortar and pestle but really big (as you can see in the video above). The Ragado has been passed down through the generations and one of the them is still in our home. My mother does not use it as often as she used to and relies more on the electric mixers for her day-to-day needs but she says that the batter made in the Ragado is much better than any machine can make. Electric version of this are available in India now, so one does not have to learn the skill. The old-school Ragado will die with this generation so we thought it would be good to capture it on film. |
